- Show results for
- Share
Photography Tips & Tricks. OM SYSTEM Cameras & Lenses For Various Scenarios: Capture The Moment
Table Of Contents
Introduction
Whether you’re a beginner or a professional, a perfect shot can sometimes feel like a puzzle. But don’t worry! With a few simple tips, you can elevate your photography skills and start taking photos that truly stand out. In addition to useful tips, in this article, you will also find out which OM SYSTEM (formerly Olympus) digital cameras and lenses are most suitable for the image you want to capture. In 2021, the change of the brand name from ‘Olympus’ to ‘OM SYSTEM’ was announced. Photographers all over the world trust this brand as it is synonymous with high quality.
And now, let’s consider different scenarios and photography tips for them in detail.
Water Droplets
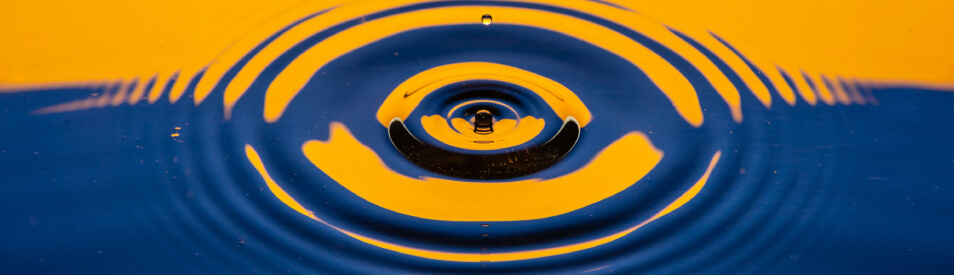
Water droplets can be tricky but let’s figure out how to make the most of them and how they can be useful for your macro photography practice.
EQUIPMENT
Camera
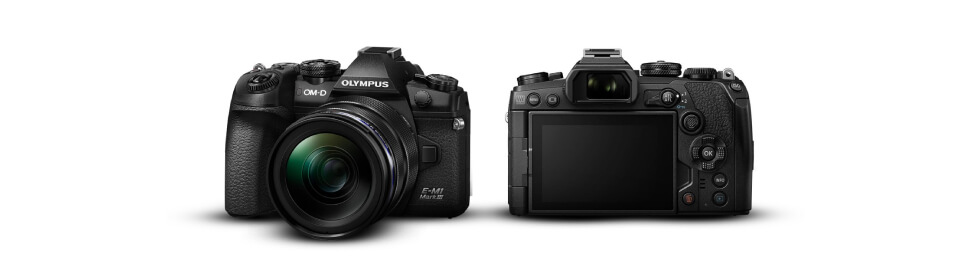
The OM-D E-M1 Mark III is lightweight and user-friendly. Take advantage of the World’s Most Effective Image Stabilization to take sharp handheld stills & video. Features include 7.0 EV Stops of Stabilization Performance, Starry Sky AF, etc.
Lens

Why use the M.Zuiko Digital ED 60mm f/2.8 Macro lens for capturing water droplets? It is able to pick up fine minute details of the water at a close distance. The lens is splash-proof (which is very useful). Features include 2x magnification (35mm equivalent) as well as a minimum focusing distance of approximately 7.5 inches. Even if there is not enough light, with the f2.8 maximum aperture of this lens, you will get excellent results!
Other Things You Will Need
- Camera Remote
- Cable Release
- Off-Camera Flash
- Tripod
- Light Stands
- Pan with Water
- Eyedropper
Preparation
First of all, get everything ready: your gear and the water you will take photos of. Secure the eyedropper above the pan with water (you can use a reflector holder arm for that).
Settings
Set your camera to Manual Mode. Set the shutter speed to sync with the flash at 1/250 seconds. Set the lens aperture at F11. Set ISO at 400.
Position your speedlight to the left of the pan on a second light stand. Take a couple of test shots to fine-tune the flash settings.
Taking Photos
As you drip water into the pan, press the shutter release and start taking photos. In the process, you will understand when the right time to press the shutter release is.
Focus
Set your camera for a single AF, place an object (for example, a screwdriver) in the pan, and focus on this object. After that, reset your camera to Manual Focus and take photos. Optionally, use Pro Capture Mode to capture additional frames.
Experiment with different colors, settings, liquid types for a photo, etc.
Sunsets
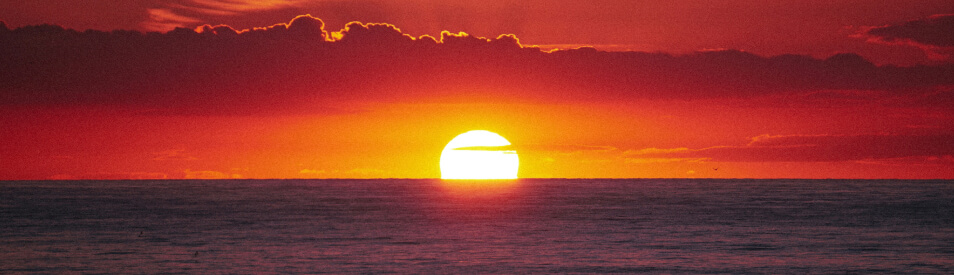
Sunset photography is a great way to capture the beauty of nature.
EQUIPMENT
Camera
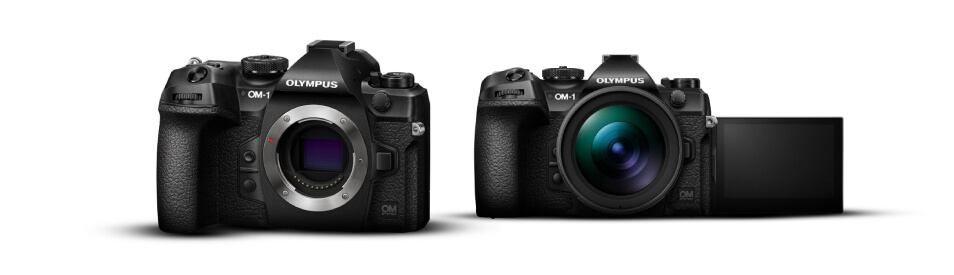
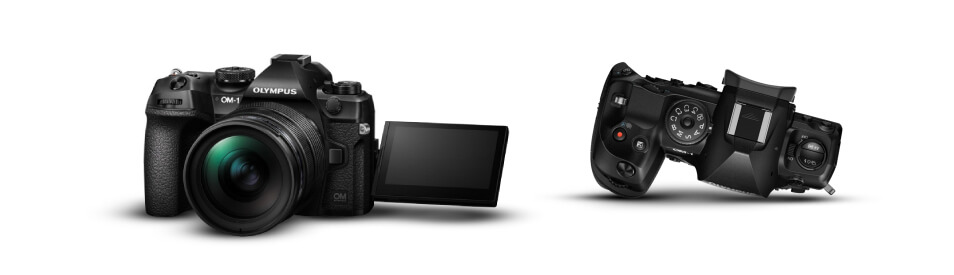
The OM SYSTEM OM-1 (formerly Olympus OM-1) camera features state-of-the-art technology. It is compact and lightweight. You will be able to take sharp photos even if there is not enough light (an ISO range that can be ramped up to 102,400).
For outdoor adventurers, this camera has a weather-sealed design. Features include a Stacked BSI Live MOS Sensor, excellent image stabilization, 130 frames per second, 8.0 EV stops of stabilization performance, 80MP High Res Shot Mode, etc.
Lenses
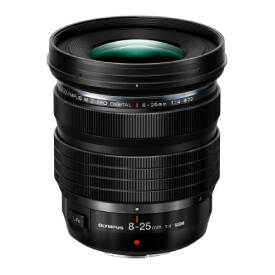
An excellent lens for shooting sunsets will be the M.Zuiko 8-25mm F4.0 PRO. It’s an ultra-wide lens that is ideal if you want to capture outdoor scenes & dramatic landscapes. It’s compact, lightweight, durable, and weather-sealed so you can use it in various conditions. Features include F4.0 constant aperture, 8 - 25mm focal length (16 - 50mm - 35mm equivalent focal length), 3.1x ultra-wide zoom, etc.
Another great lens for sunsets is the M.Zuiko Digital ED 12-100mm f/4 IS PRO. It is the only pro high magnification zoom to cover a 35mm equivalent 24-200mm focal range on its own. It has a durable, weatherproof construction & premium glass for unmatched optical performance. The auto-focusing is fast. With this 12 100 mm lens, you will enjoy impressive sharpness thanks to 5-Axis Sync IS, the most powerful image stabilization system in the world.

But choosing the right lens is only part of your success! Here are a few tips:
- Take advantage of a good composition (a landscape is an excellent choice with its foreground, midground, and background).
- Decide what your point of interest will be, it should attract the attention of the viewer.
- Eliminate distractions (wait until the autos or people you don’t want in your shot pass; move your camera away from the pole or branch you don’t need).
- Frame the shot using a natural frame (e.g. rocks, trees, and so on).
- Use a tripod. When the sun goes down, it will help you achieve the best results.
- Take advantage of longer exposures. You will smooth out the moving water (if you take a photo of the lake, river, sea, or ocean). With long exposures between 30 & 60 seconds, you will achieve very picturesque clouds.
- Increase the depth of field (the distance between the closest & farthest objects that are acceptably sharp in your photo). Use focus bracketing & stacking. Using a focus stacking feature of your camera, take a few photos. When stacked, the series of images will allow you to enjoy clarity throughout your photo.
- Work with the light. There are periods of the day when the subject in the foreground of your photo appears darker than you would like it to be or the sky is too bright. Use a graduated neutral density filter (a piece of glass that transitions from neutral grey at the top to clear at the bottom). It will make your foreground subject brighter and the sky darker.
- Use a telephoto lens. It is perfect for sports photography or wildlife shots. For sunsets, it can also come in handy as this lens can compress space & enlarge features.
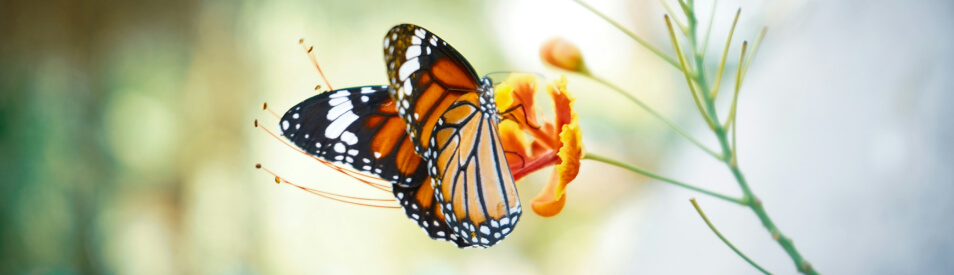
Butterflies
EQUIPMENT
Camera
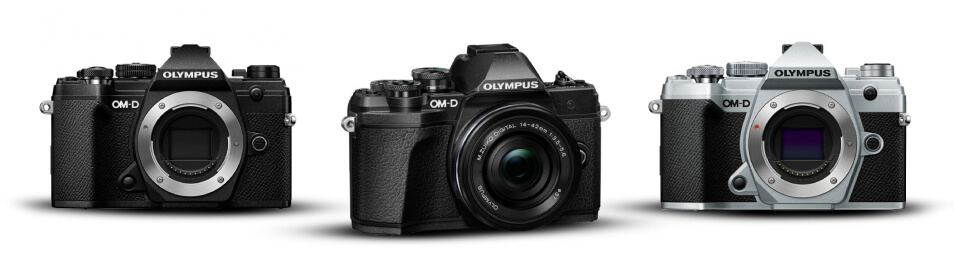
The OM SYSTEM OM-D (formerly Olympus OM-D or sometimes called Olympus OMD) series includes revolutionary, interchangeable lens cameras that are exceptionally powerful, and at the same time lightweight & compact.
The OM-1 (formerly Olympus OM1) is a great camera for capturing the world of butterflies.
Lenses

The M.Zuiko Digital ED 40-150mm f/2.8 PRO is a compact, full-featured zoom with premium metal construction & pro-quality lens elements. Being lightweight and fully sealed for use in various weather conditions, this lens offers extra-sharp edge-to-edge image quality. In addition, it has the world’s 1st Dual VCM autofocus mechanism.

The M.Zuiko Digital ED 12-100mm f/4 IS PRO zoom covers a 35mm equivalent 24-200mm focal range on its own. It has a weatherproof design. Benefits include fast auto-focusing, 5-Axis Sync IS for sharpness, etc.

The M.Zuiko Digital ED 90mm f/3.5 Macro IS PRO is the ultimate field macro lens for professionals as well as amateurs interested in macro photography. Features include a 2x magnification ratio (4x with a teleconverter), In-lens Sync IS, the ability to auto-focus with macro credentials, and a weather-sealed design.

The M.Zuiko Digital ED 60mm f/2.8 Macro can pick up fine minute details at close distances. This lens features a 2x magnification (35mm equivalent) & minimum focusing distance of about 7.5 inches. The lens also boasts an extra-bright f2.8 maximum aperture for excellent performance in poor lighting conditions. The construction of this lens is designed to eliminate chromatic aberrations.
For butterfly photography, you will need patience and also a set of useful tips.
- Find a simple background that won’t distract the viewer from the main subject - the butterfly. The greens or clear blue skies will be perfect.
- Use eye level. You can take advantage of a flip-out articulating screen or you can get down on the ground.
- Make the most of your gear. Handholding is fine for butterfly photography, but a tripod with a focusing rail will allow you to make more precise adjustments. If you want to take a good photo, you can do it with various cameras and lenses.
- Point the shadow toward the subject. Make sure that the sun is on your back. Sidelight is also acceptable. Backlighting can be useful if you want to capture the translucency of the butterfly’s wings.
- Learn the butterfly carefully. Watch your subject and wait for its best position and, as a result, a better composition.
- Take advantage of a polarizing filter. If there is enough light, you can use it. Purchase a good large filter as well as step-up rings.
- Think about the composition of your shot. When photographing a butterfly, experiment with various positions like a butterfly with open or closed wings, head-on, or profile photo (for this one, you will achieve an increased depth of field (DoF) if you place your camera’s sensor parallel to the wing). Avoid placing the subject in the center. Incorporate negative space and use the Fibonacci ratio or the rule of thirds to improve your composition. In addition, you can use the grid on your camera. Try both vertical and horizontal variants of the composition. Be mindful of the distractions in the corners. Also, consider using a leading line, patterns, etc.
- Choose the right camera settings. Adjust the shutter speed to the pace & rhythm of the butterfly. For a butterfly in the flower, typically, 1/100 is enough. However, for a flying butterfly, it is recommended to increase the shutter speed to 1/1000, 1/2000, or higher. Shoot in the manual mode for better control. With aperture priority, you will control the aperture for the background and the subject’s DoF. Shutter priority will let you select the shutter speed and it will use the exposure triangle to determine the most suitable aperture. It is great when there is not enough light. In addition, check the histogram and take advantage of the ETTR. Try to avoid overexposed highlights.
- Make sure that the sensor of your camera is parallel to the butterfly’s plane. The factors below control the DoF. Focal Plane: When the camera back is angled and you focus on a point, the plane of focus will be at the same parallel angle as your camera’s back. Focal Length: Wide-angle lenses will provide a better DoF, while telephoto lenses create a shallower DoF. Camera-Subject Distance: The closer a photographer is to the subject, the less depth of field they will have. Magnification: The DoF varies with the square of the magnification & proportionally with the aperture. Aperture: A wide aperture results in a shallow DoF, while a small aperture gives a deeper DoF.
- Use a flash. It lets you take advantage of higher shutter speeds & freeze the motion of the butterfly in the shot. Try using a fill flash to brighten up the shadow areas. You can also turn the flash off and get a black frame using settings. After that, turn the flash on to illuminate your subject.
- Use focus stacking. You will get a greater depth of field.
- The OM SYSTEM OM-1 (formerly Olympus OM 1) is a universal camera that is suitable for various scenarios, including astrophotography.
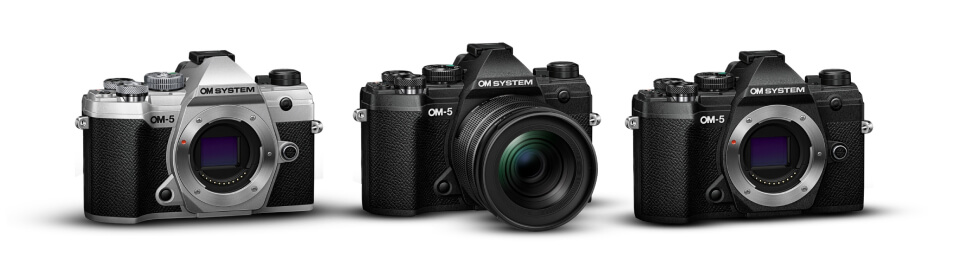
- Another great option is the OM SYSTEM OM-5 camera. It is compact and durable (can be used even if the weather isn’t good). Features include Live ND, AE Bracketing, Focus Bracketing, Starry Sky AF, Multi Exposure, and more.
- The OM-D E-M1 Mark III is another great camera, it has the Starry Sky AF feature to make your astrophotography session a better experience.
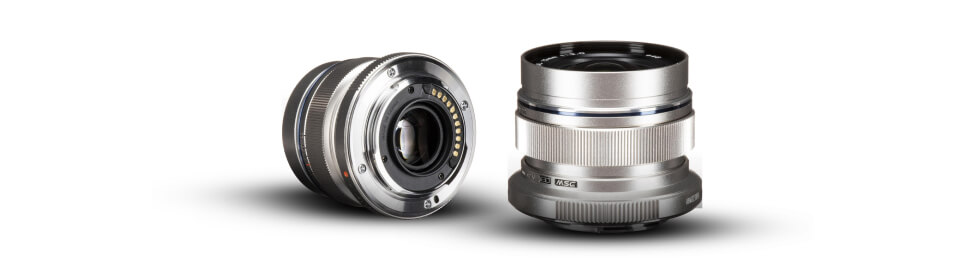
- The M.Zuiko Digital ED 12mm F2.0
It is a high-speed, single-focal-length, wide-angle lens. It has a flexible focusing system and the MSC mechanism. The lens is perfect for high-quality, dramatic landscapes (including nightscapes) as well as street scenes in low-light conditions. - The M.Zuiko Digital ED 17mm F1.2 PRO
With this lens, you can shoot wide open at f1.2 & effortlessly capture sharp subjects, smooth feathered bokeh, and natural 3D effects for unparalleled depth. The ED-DSA element reduces the size of the lens and improves performance. The focusing mechanism is lightweight, fast, quiet, and accurate. With dustproof and splashproof metal construction and excellent results in low-light conditions, this lens is a great option for capturing the beauty of the night sky.
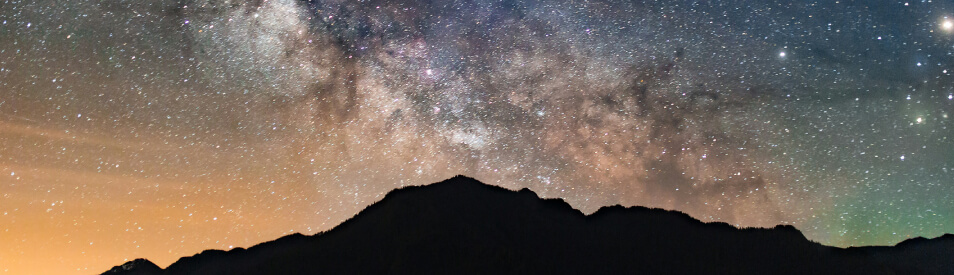
Astrophotography
EQUIPMENT
Cameras
Lenses
For the best night sky shots, use a wide-angle lens with an aperture of F2.8 (or larger). You will also need a tripod and a headlamp. The fast lens capability of gathering extra light can impact the overall exposure as well as clarity. Here are great lenses for nightscapes:
PREPARATION
Here are a few things to consider before shooting the night sky.
Clear Sky
Plan ahead by checking weather forecasts and satellite images for clear skies. If there are clouds but there aren’t many of them and they add to your photographs, that’s great. Note that humidity also impacts star visibility.
Light Pollution
Check out online maps to find locations with less light pollution.
Moonlight
Moonlight can cause light pollution. But you can avoid it, just track moonrise and moonset times.
The Milky Way
The Milky Way core is hidden in winter but it’s visible again in spring in the northern hemisphere. By August, it's visible by the time the sun sets. Look toward the southern sky to spot the core.
Your Comfort
Nighttime shoots take longer than daytime ones. Temperatures drop quickly, even in summer, so dress in layers.
COMPOSITION
Look for a Site
Navigating at night can be tricky, even in familiar places. Scout during the day and bring a good flashlight or headlamp when you come back at night.
Look Beyond the Milky Way
The Milky Way stays the same but your composition doesn’t have to. For example, you can include a unique foreground element.
Silhouettes
A silhouette in the foreground like a tree or mountain can create striking contrast. Use long exposures.
Brighten the Scene
Light painting using a flashlight/headlamp can add depth to the foreground of your shot. Avoid overexposure and consider using dimmable LEDs for more control.
THE SETTINGS OF YOUR CAMERA
Preparation Before the Shoot
Adjust your camera settings before heading out as your eyes need time to adjust to the dark.
Choose RAW
Switch to RAW for more information and maximum flexibility in post-processing.
WB
Set a custom white balance around 3600-3800 Kelvin. Or use the Tungsten (or Incandescent) programmed setting. With RAW, you can adjust this later.
Focusing
Autofocus won’t work well in the dark. Select manual focusing & set the lens to infinity. Another way is to use the Starry Sky AF feature, it will do the focusing for you. OM System cameras with this feature include the OM-1, OM-5, and the E-M1 Mark III.
Aperture
Use a large aperture (f/2.0, f/2.8, f/3.5) to capture as much light as possible.
Shutter Speed
Take advantage of the 400 rule to determine the maximum shutter speed that can be used. Divide 400 by the true focal length of the lens and you will get the maximum shutter speed before star trails will be noticeable.
The true focal length is the full frame equivalent of the lens (or 35mm SLR equivalent). It depends on the crop factor of your camera sensor. Since Olympus sensors have a 2x crop factor, for a 12mm lens, for example, you will need to do the following calculation: 400 / (12mm x 2), which equals 16.6 seconds. Round it down to the closest shutter speed and you will get a 15-second exposure. As a result, the stars will be sharp in your photos.
ISO
Shoot within the 3200-6400 ISO range for a good balance between sensor sensitivity and noise. For less noise, use the 1600 ISO.
Reduce the Noise
Enable the built-in noise reduction function to reduce graininess. Expect longer exposures.
Program the Settings
Save your preferred settings, use custom settings (C1, C2) for quicker access.
Night Vision
Use the Night Vision feature to brighten the viewfinder and help with the composition in the dark.
Lens Condensation
Prevent condensation using a lens heater, hand warmer, or a small fan to keep the lens clear during long shoots.
Conclusion
The quality of OM SYSTEM products is as great as the quality of Olympus cameras (Olympus digital cameras) and Olympus lenses, Olympus binoculars, Olympus recorders (Olympus digital recorders, Olympus digital audio recorders), etc.
On Prime Buy, you choose from a wide range of OM SYSTEM cameras. In addition to those mentioned in this article, you can also buy OM SYSTEM OM-D E-M10 Mark IV (Olympus E-M10 Mark IV, Olympus E M10 cameras are great), OM SYSTEM TG-7 (Olympus Tough fans will love it), and more. On our website, there are also various OM SYSTEM lenses, binoculars, transcription kits, OM SYSTEM recorders, batteries, and more. Shop with us!