
- Show results for
- Share
How to Use an Oxy-Acetylene Torch
An acetylene torch or as it is also called blow torch is a dangerous cutting tool to work with. This equipment can be used for different cutting works with metals. However, you should create a safe working environment and monitor the pressure of the oxygen carefully to work with this tool.
Preparing your Working Area
Prepare a fireproof uniform and heavy leather-soled boots. Don’t wear oversize uniforms and those that are made of synthetic materials. If you don’t have a specific uniform, you can wear clothes made of cotton tissue. Synthetic tissue would burn immediately if they caught on fire. Leather-soled boots or leather welding legging may prevent you from hot particles that can burn rubber-soled boots. It is also advised to wear welding goggles of mask and heavy-leather gloves for higher heat protection.
Take the fire extinguisher and place it at hand. It is also advised to work in pairs when the second person may warn you if something catches fire during the cutting. Clean your working space from materials that may catch the fire with ease. Prevent flame contact with concrete as it can create a crack of concrete and small particles of the material may damage someone.
Install the material you want to cut on a steel area. Steel table is a perfect area for cutting. Don’t use areas that may catch fire immediately such as wooden tables. In addition, don’t use metallic materials with oxide coverings as their fumes can be toxic to inhale.
When you should make a more accurate cut, measure the distance on the material you want to cut and mark it with a marker. It would be better to use a soapstone marker, but you also may use a permanent marker.
How to Set Up the Oxy-Acetylene Torch
Step 1:
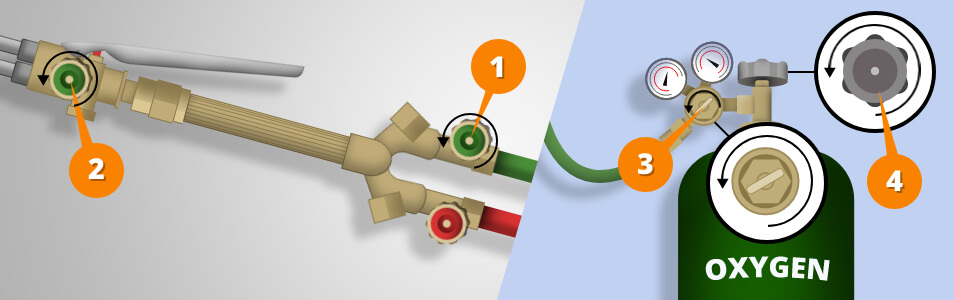
Plug in hoses and measurement calibers to the proper cylinder. In fact, the color of the cylinder is common to the color of hoses and measurement calibers it matches. For instance oxygen cylinders are usually green and acetylene - red.

Step 2:
Check the acetylene controller is shut down. Pull the tee handles back a few turns. This controller is usually placed right next to the controller measurement caliber. Acetylene higher than 15 psi becomes erratic and may explode.

Step 3:
Activate the gas tap placed on top of the acetylene cylinder with one turn. If you turn the gas tap more than one time, the gas will become unsteady, which may create problems with turning off in the event of an emergency.

Step 4:
Activate the controller tap turning the tee handle to the right. You shut this handle down before activating the gas tap. You should activate the controller tap very slowly. Check the low pressure measurement caliber while activating the controller. Stop activating until the pressure measurement caliber indicates 5-8 psi.

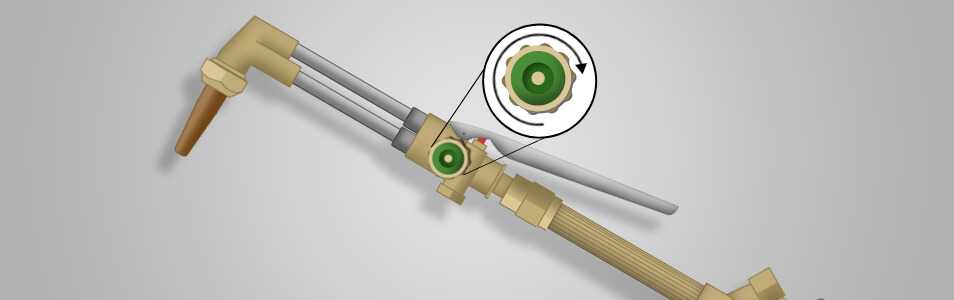
Step 5:
Activate the gas tap on the torch to release the air from the acetylene tube. Stop activating when you hear gas escaping, then check the low-pressure measurement caliber to be sure the pressure is steady during the flow and the controller is installed right.
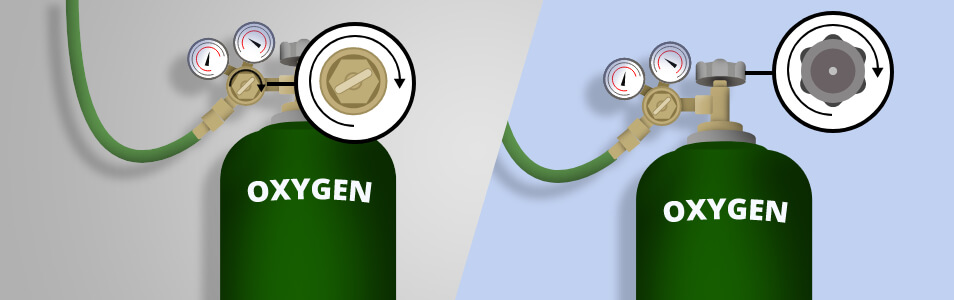
Step 6:
Turn the oxygen controller off when you close the acetylene controller and pull the oxygen measurement caliber out a few turns. After that turn the handle on the oxygen cylinder. The oxygen tap is double-seated, that is why be sure to turn the handle so the tap is entirely activated.
Step 7:
Activate the oxygen controller very slowly as you did with the acetylene controller and check the low-pressure measurement caliber until 25-40 psi.

How to Use an Oxy-Acetylene Torch
Step 1:
Activate and close the oxygen tap on the torch to release the air. There are two taps on the oxygen torch side. Firstly, activate the tap next to the hose. Then activate the forward tap and close when the hose is cleared out.
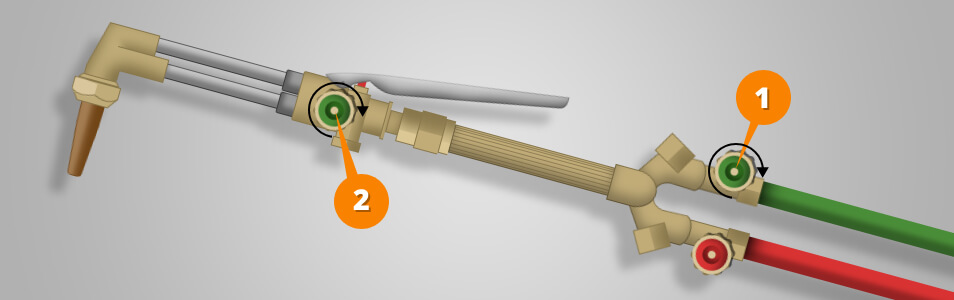
Step 2:
Activate the acetylene tap again, offering the oxygen to balance for a few seconds, then close the tap when you barely hear gas leaks. Fire up the torch holding the striker in front of the torch tip and press the handle. There should appear a short yellow flame. Fix the acetylene valve when you see the flame about 10 inches (25 cm).

*Notes:
Don’t use matches or cigarette lighter to fire up the torch. It may create the risk of serious injuries!
When the stream of the acetylene is too strong, the flame “jumps”. This can expand the risk of fire injuries!
Step 3:
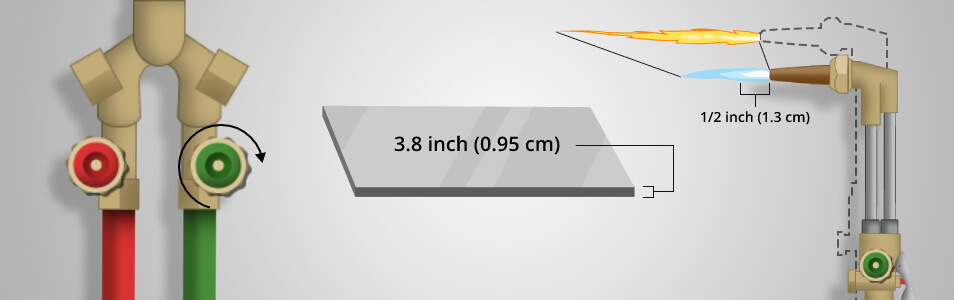
Activate the oxygen tap slowly. The yellow flame color will change to light blue, because of the oxygen supply. Boost the oxygen slowly until the flame retreats toward the tip and then activate it more to set the flame size according to the size of the material you want to cut. For instance, the flame of ½ inch (1.3 cm) is perfect for cutting the material of ⅜ inch (0.95 cm).
*Note: When you hear a blowing noise and the flame is unstable or feathery, it means you should reduce the oxygen to make the flame steady.
Step 4:
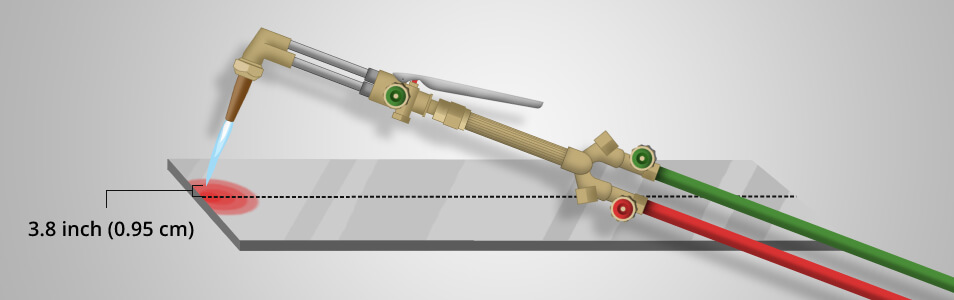
Take the flame near the material you have to cut. You should heat the material with the flame. Don’t place the flame too close to the material, keep it stable at the distance ⅜ inches (0,95 cm) to maintain the flame in one direction.
Step 5:
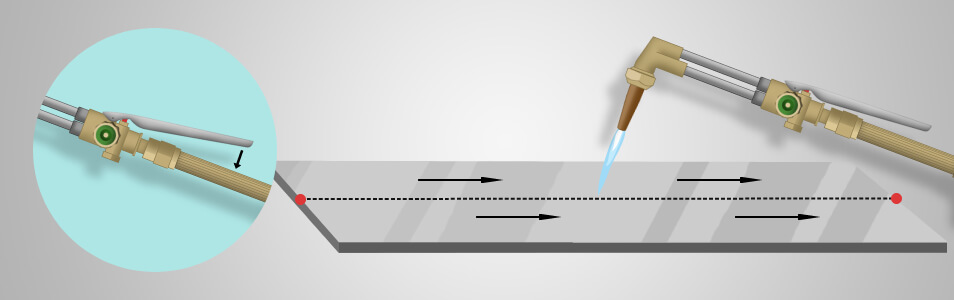
Press the cutting tap handle down to relieve the oxygen jet to torch the soft material. When the violent reaction starts, it means the material is soft and you can boost pressure until the jet cuts the material entirely. Start moving along the direction you marked with a marker for the cut. Cut until you have finished the cut or parted the needed material.
*Notes:
When there is no reaction, it means the material is not soft enough and you should relive the oxygen handle and let the flame heat the material more.
If you want to get a more accurate cut, move too slowly rather than too fast.
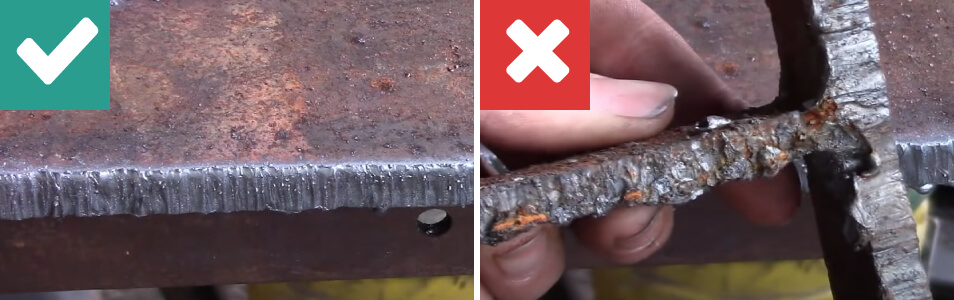
You can see the cutting edges or as they are known - drag lines. This is a fairly clean cutting, that means the cutting operation was correct and the oxygen and acetylene were set in a proper way.
If you get the erratic and sharp cutting edges it means you set something wrong or you cut in an inappropriate way.
Step 6:
When you finished cutting, turn out the torch tap and then the oxygen. After that, shut off the cylinder taps on the oxygen cylinder and pull out the controller pressure screw and repeat the same actions with the acetylene cylinder.
*Note: Some brands’ instructions may advise you to turn out the oxygen first. That’s why, follow the manufacturer’s instructions carefully.
Step 7:
Cool the material you have cut with an amount of water. Be careful with superheated material. Pouring the stream of cold water will create a maximum hot cloud. Let the material cool in a natural way for some time.
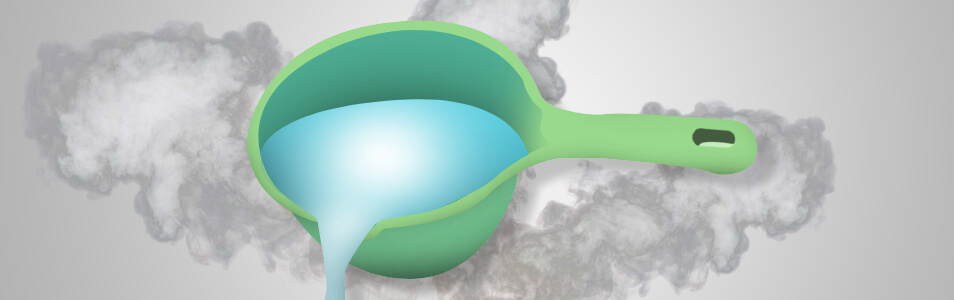
*Note: If you cut material of temper-type steel, let this material cool naturally, because the water may create deformation.
The Oxy-Acetylene Torch is very dangerous. Using it incorrectly may create several damages for your working area for you and your colleagues. Be careful with the oxygen and acetylene pressure. Follow the steps carefully to make your operations safe. Be sure that you operate accurately as it is written in the instructions.


