- Show results for
- Share
How To Use A Belt Sander
Everything You Need to Know About Working with a Belt Sander
Belt sanders haven’t changed for a long time. In this article, you are going to find out about how to work with a belt sander, how to change the sanding belt, and more.
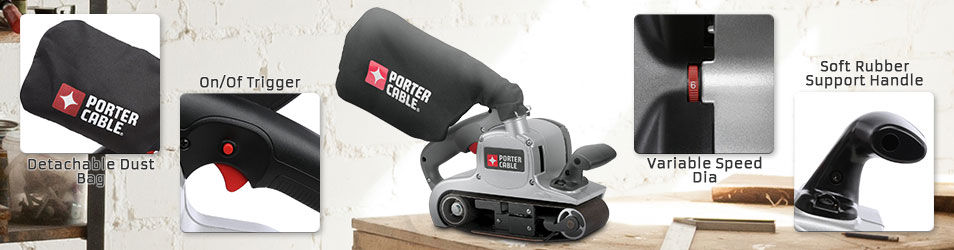
A portable belt sander is a pretty basic unit. You’re going to have a dust bag that clips on and off of the sander itself. The instrument is simple. There’s just a trigger on it. Usually, you will see a button you have to push before you pull the trigger. It is a kind of a trigger lock.
The main thing you need to know with the belt sander before you get started with it, is choosing the right grit of sandpaper. It depends on your project.
If you want to know how to change the belt sander, read the following instructions.
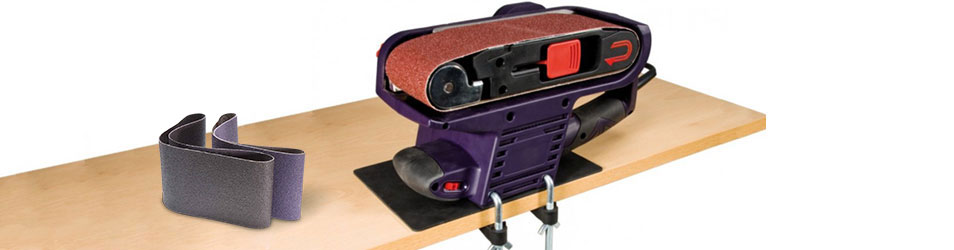
 You’re going to have a tensioner that releases the tension so that the belt will slide off. And then,
you’re going to put on the appropriate sanding paper that you want to use.
You’re going to have a tensioner that releases the tension so that the belt will slide off. And then,
you’re going to put on the appropriate sanding paper that you want to use.
 As you
look inside the belt, there’s a bit of information that’s written on the belt. Usually, you will see the
grit and the part number. Most are going to have a direction related arrow. Some arrows will point either way which
means the belt can turn either way so you don’t have to really worry about it. If you put the sander down
running and it would want to take off forward, then get your belt orientated in the right direction. Work it around
the two wheels there, push it on basically all the way, and then push closed your tensioner.
As you
look inside the belt, there’s a bit of information that’s written on the belt. Usually, you will see the
grit and the part number. Most are going to have a direction related arrow. Some arrows will point either way which
means the belt can turn either way so you don’t have to really worry about it. If you put the sander down
running and it would want to take off forward, then get your belt orientated in the right direction. Work it around
the two wheels there, push it on basically all the way, and then push closed your tensioner.
When you first turn the sander on, you need to look at how the belt is tracking to make sure it’s not tracking way over tight where it can get snagged and ripped. Make sure it’s up off the surface.
There is a piece on the back that basically collects the dust and helps direct it into the bag but it also gives you a surface so you can set the sander down on without the belt touching the table.
Plug it in to check the tracking. Squeeze the trigger keeping both of your hands on the sander and keeping your body back from the instrument. If the belt tracked in a little bit, by adjusting the knob it tilts this one drum and it will track the paper in or out until you get it to the position you want it in. Generally speaking, you just want it to track so that it’s running nicely on the two wheels front and back and it’s not crowding over to the edge of the knob or coming way off to the side.
 If
you’re doing a fair bit of sanding, don’t forget to wear a dust mask for some respiratory protection. In
addition, depending on your sander, you might want some ear and eye protection.
If
you’re doing a fair bit of sanding, don’t forget to wear a dust mask for some respiratory protection. In
addition, depending on your sander, you might want some ear and eye protection.
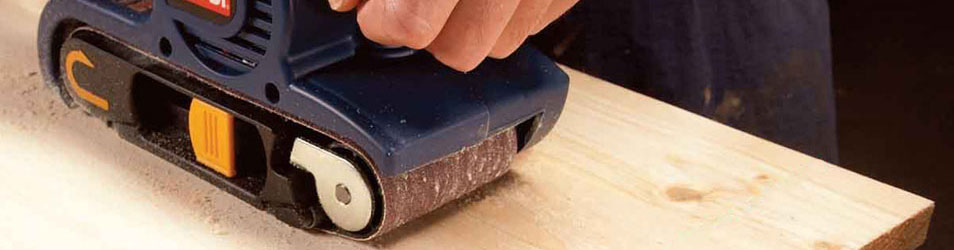
 As soon as the sander starts, start moving the sander and try to work the sander the same
direction as the grain of your wood. Don’t sand across the other way because it’s just going to leave a
bunch of scratches and marks across the grain especially if this is something you’re going to finish nicely
after that. The key is to keep the sander moving. The other key is to keep the sander as flat as possible on the
work surface so you’re not tipping it one way or the other, because it can cut a groove in there or sand it
unevenly.
As soon as the sander starts, start moving the sander and try to work the sander the same
direction as the grain of your wood. Don’t sand across the other way because it’s just going to leave a
bunch of scratches and marks across the grain especially if this is something you’re going to finish nicely
after that. The key is to keep the sander moving. The other key is to keep the sander as flat as possible on the
work surface so you’re not tipping it one way or the other, because it can cut a groove in there or sand it
unevenly.
 In
case your wood is aged, you can easily see where it sanded more (the color is changed there) than in other areas
(they are a little bit darker). When you’re sanding your project, usually those are good indications of how
well of a job you are doing - whether it’s flat or not.
In
case your wood is aged, you can easily see where it sanded more (the color is changed there) than in other areas
(they are a little bit darker). When you’re sanding your project, usually those are good indications of how
well of a job you are doing - whether it’s flat or not.
Make sure to have your sander unplugged when you’re changing your paper. Don’t set it down on a surface when it’s running, if it’s a surface you are not trying to sand because it will leave a mark. Please be careful when using a sander so it doesn’t harm you or somebody else.