- Show results for
- Share
How to Choose a Charge Controller

- What does a charge controller do?
- MPPT vs PWM Charge Controller
- Things to Consider
- Features
- Sizing
- How to Connect a Charge Controller to a Solar Panel?
- Final Thoughts
Nowadays, solar panels (SPs) are widely used in many countries the world over – a great and environmentally friendly way to get electricity! So, how does it work?
The cells of the SP “receive” the light coming from the sun. A chemical reaction takes place and direct current is generated. Then, DC is transmitted into the battery that is charged using it. That’s how, in short, we can get electricity from the eye of heaven. As a result, you can charge your favorite gadgets like smartphones, tablets, laptops, and the list goes on.
But if you don’t use a charge controller (regulator), you risk damaging the panel(s).
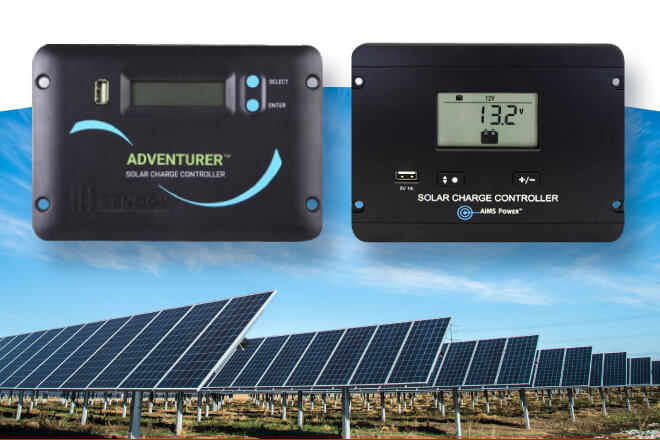
What does a charge controller do?
It is a special device that is designed to regulate the current (I) and/or voltage (V) that come from the source to the battery. As a result, your battery bank isn’t overcharged. Obviously, a reliable charge regulator is an important part of a photovoltaic system.
MPPT vs PWM Charge Controller
There are various options, they all differ in type, size, and so on. Finding the right one may be a difficult task but you need to make the right decision anyway so… keep reading!
You can choose from two types. As everything under the sun, each of them has its pros and cons, let us figure out how they operate and which one is better for your application.
| PWM (Pulse Width Modulation) | MPPT (Max Power Point Tracking) |
|
– Power is pulsed into the battery, the amount of time or the length/width of the charge is changed. – When turning off, they measure the battery V & adjust for the next pulse. – The SP V drops down to just above the battery V. – V increases as the battery charges up. Next, the regulator outputs the higher V & reduces the width of each pulse. – These devices are more simple and affordable as well. – Perfect for small setups. |
– They track the output of the solar array and adjust so that the output is always maximized. – There is a lower V drop, which means that the batteries will get more power. – They have a more complex technology inside so they are on the pricey side. However, they are more effective. – Great for bigger systems & demanding tasks. |
Things to Consider
Here’s a short list of key factors that are important when choosing a proper device:
• nominal system voltage (V of the battery banks your charge regulator is compatible with);
• max solar input (volts that can go into the regulator);
• rated battery current (more current than rated can be utilized by an SP);
• terminals (there is a max gauge size for the terminal that a regulator has);
• battery compatibility.
If you know the above-mentioned factors, there are more chances to select a device that will meet your needs.
Features
|
A good charge regulator has several useful features that make this
device an irreplaceable
component of the solar power system. When shopping, pay attention to: |
|
| Battery Bank Multistage Charging - the amount of power set to the batteries is changed based on the charge level, which is good for your batteries, thus you will extend their lifespan. | |
| Reverse Current Protection - at night, the panel's V is lower than that of the battery bank. This high-low roller coaster of the electricity can result in the ‘escape’ of the electricity from the battery. | |
| Low Voltage Disconnection - the attached load is turned off in case the battery is low. | |
Sizing
Different types are sized differently. Charge regulators are sized depending on the I and V of the SP & battery. Of course, the best decision is to select the one that can cope with the full current potential of the SP.
As a rule, there are controllers that come in 12V, 24V, and 48V variants. As for amperage, there is a range from 1 to 60 amps.
Generally speaking, your charge regulator should handle more than the SP you use is able to generate.
|
PWM (Pulse Width Modulation) Such a device can’t limit its current output, so the user needs to match/exceed the SP’s current. Your charge regulator should be able to exceed the amp rating of the SP. It’s recommended to exceed the amp rating by 25%, multiplying the amp rating of your SP by 1.25. So you need to select a device that has an amp rating that exceeds that number. |
MPPT (Max Power Point Tracking) With these controllers, no matching to the max output of the SP is required. But they should exceed the current potential of the SP to enhance the level of efficiency. Divide the total wattage of the system by the lower voltage value between the SP and the battery. Follow Watts/Volts to determine the amps. Here is an example: if there is a 900W solar panel with 48V and the voltage of the battery is 24V, just divide 900W/24V to get a value of 37.5A. Now add 25% and you will get 46.9A. Thus, you will need a charge regulator that can handle 24V and 50A. |
Well, the process of your controller's sizing is not that complicated, right? We hope that now you have an idea about the procedure.
How to Connect a Charge Controller to a Solar Panel?
There are various models to choose from, however, they all have a solar array positive input terminal, a solar array negative input terminal, a battery positive output terminal, and a battery negative output terminal. So, there are two terminals for solar array wires and two - for the wires that go to the battery.
Let’s take a look at the scheme below. All of these three elements are interdependent in this setup and it is crucial to connect them in a proper way.
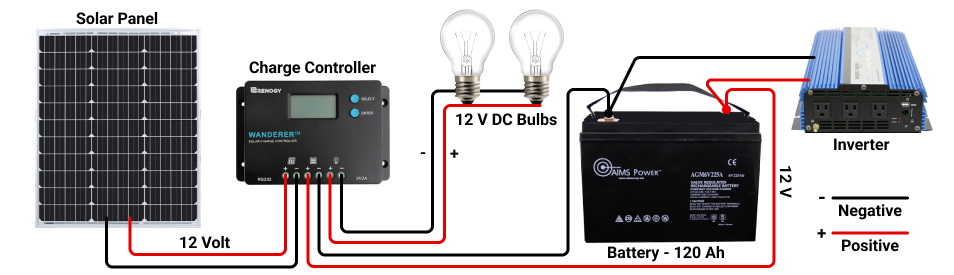
1. Connect the Battery to the Charge ControllerThe following components should be connected: BATTERY (B) > CHARGE CONTROLLER (CC) > SOLAR PANEL (SP) “-” B cable > “-” B terminal “+” B cable > “+” B terminal |
2. Connect the MC4 Solar Adapter Cables to the SPEach MC4 connector > at the end of each of the SP cables MC4 inline fuse & “+” solar adapter cable > “+” SP cable “-” solar adapter cable > “-” SP cable NB The exposed wires shouldn’t touch! |
3. Connect the SP to the Charge Controller“-” solar cable > “-” solar terminal “+” solar cable > “+” solar terminal Congratulations! Mission complete! |
Final Thoughts
Now you understand that using a quality and properly chosen charge regulator is essential. You know how it works, its advantages & the difference between two types so you can decide for yourself, which one is the best to meet your needs. Hopefully, now you can easily connect all the parts and everything will work smoothly.
The importance of using a reliable device cannot be overstated, at the end of the day, it is a reasonable step to pay for a charge regulator if you don't want to buy new SPs instead.
Bear in mind all the aspects when shopping - find the right option on our website!