AVA6+ Includes Only:
- AVA6 Plus scanner
- Power Supply
- USB 2.0 Cable
- CD-ROM includes:
- Scanner Driver
- (TWAIN Driver)
- Avision Button Manager
- ScanSolt PaperPort
Features:
- Scan A6-sized document in 7 sec. (B&W)
- A6 Color Scanner
- An ideal scanner for ID card, driver license, or passport
- Only a few seconds per scan
- High speed USB 2.0 interface
- TWAIN compatible
Avision's Button Manager Lite 2,allows you to scan ID card or photo and link it to your predefined software application with a simple press of the button
The Avision AVA6 Plus scanner is your ideal scanner for capturing small-sized documents such as national and medical ID card, driver license, or passport. With it's lightweight and compact design, the Avision AVA6 Plus is a perfect companion on your desktop. Using the TWAIN-compliant software, you can easily save and keep the information of ID cards within seconds.
Don't let its slender appearance fool you, the AVA6's imaging quality is no less superior than other full-sized models, thanks to the CCD-based image processing component. Its high-speed USB 2.0 interface saves you valuable time in your document processing tasks, while preserving the highest quality of the processed images.
What is best, with the exclusive and state-of-the-art software application, the Button Manager Lite, you can capture your ID information in just a press of a button and at the same time link the scanned image directly to your preconfigured destination applications such as e-mail or printer.
What was bundled
The Avision AVA6 Plus scanner comes with TWAIN driver and is also bundled with full version of exclusive Avision Button Manager and ScanSoft PaperPort.
Avision's Button Manager Lite 2
Completes your scan in a single step
Avision's state-of-the-art software application, the Button Manager, enables you to complete complex scanning task in just a single step. When the button is pressed, the scanner automatically scan your documents and convert them to BMP, JPEG, GIF, or TIFF file formats and then send the file to a designated folder, or other destination applications such as e-mail, printer, or your favorable software application. The original step-by-step procedure is replaced with only a single touch of the button.
Fit for both first-time and experienced users alike
For first-time users, Avision's Button Manager provides a true ease-of-use with the 2 pre-configured file formats and destinations for the two buttons on the scanner. For advanced users, Avision's Button Manager makes full customization possible. For example, you can change scan settings, file formats, or even add destination software application to fit your own scanning needs.
Using the Button Manager Lite
By simply pressing the button on the scanner, the scanned document will be sent to your designated destination application. Yet, before you scan, it is recommended to check the button configurations first to ensure a proper file format and a destination application.
Checking the Button Configuration before Scanning
1 . Alter the Button Manager and the scanner driver have been successfully installed on your computer, the Button Panel will be displayed in the Windows System Tray at the bottom right corner of your computer screen.

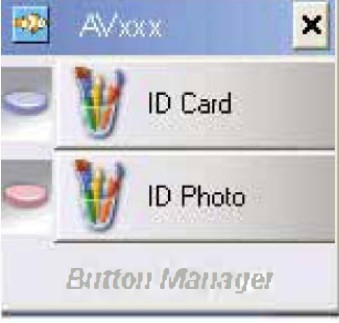
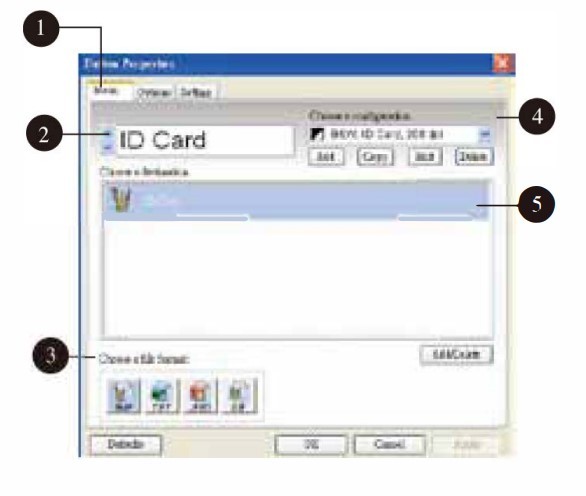
2.The Button Panel shows the predefined scanning buttons. Right-click the button (function) you wish to check, the Button Properties window appears.
- 1. Click to select options or setting.
- 2. The button name.
- 3. The file format of the scanned image.
- 4. The scan settings for the selected button.
- 5. The destination application.(This is the application that opens alter you have finished scanning.)
The default setting is indicated in highlighted color. If you wish to change the setting, use this window to reset the setting for the file format, destination application, or other scan settings.

3.Click the OK button to leave the window.
The Default Button Settings
The scanner is shipped with preconfigured button settings for your basic scanning tasks such as scan-to-folder, scan-to-email, and scan-to-printer. The following table shows these factory default settings. You can change any of these settings.
Press the Button to Start Scanning
l. Press the button you wish to digitize your document.
2. Within seconds, the scanned image is captured and the destination application is opened in your computer screen.
For more information, please see  Data Sheet